Sunday, December 1, 2019

November STEAM Challenge: It's a Balancing Act

November/December STEAM Challenge
Lesson Plan: (CLICK HERE to access these directions
in a HyperDoc)

Once again I am stealing the challenge from one of
my favorite bloggers: Sarah from Frugal Fun for
Boys and Girls


CLICK HERE for the Slides to present
the challenge

This month’s challenge has three materials:
  • Plastic Snack Cups (Walmart)- 
  • crafter sticks (Dollar Tree) - CLICK HERE
  • Wooden cubes (Amazon) - CLICK HERE
Children’s Books that are a great spark:
Balancing Act: CLICK HERE
Balance the Birds: CLICK HERE


(It is in Korean but there are subtitles which are great for the
students’ to read!)


CHALLENGE: (I’m giving you 3 to choose from)
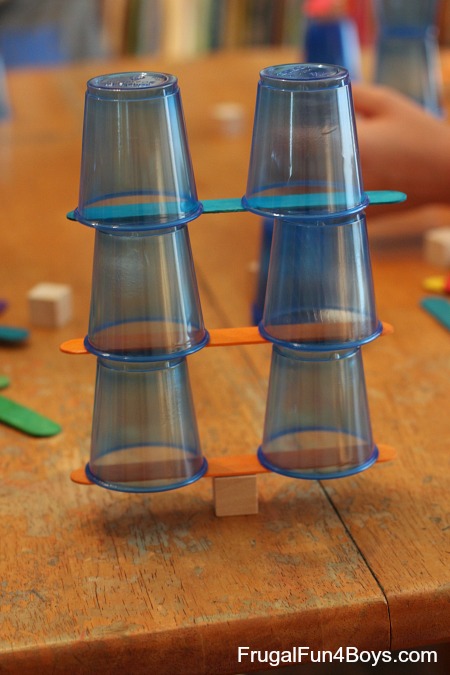
Challenge #1: Build a structure with one cube as the base.
Yes, just one cube!
I’m providing a picture but don’t show
it to the students unless you have to… let them struggle and
figure it out!
Here is an example from the Frugal Fun for Boys and
Girls Blog:
4 Engineering Challenges for Kids
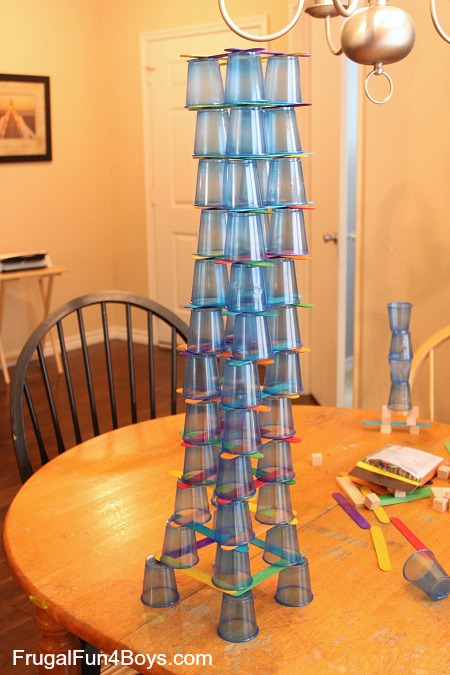
Challenge #2: Using any size base, build the tallest
possible structure.
I’m providing a picture but don’t show it to the students unless
you have to… let them struggle and figure it out!
Here is an example from the Frugal Fun for Boys and Girls
Blog:
4 Engineering Challenges for Kids
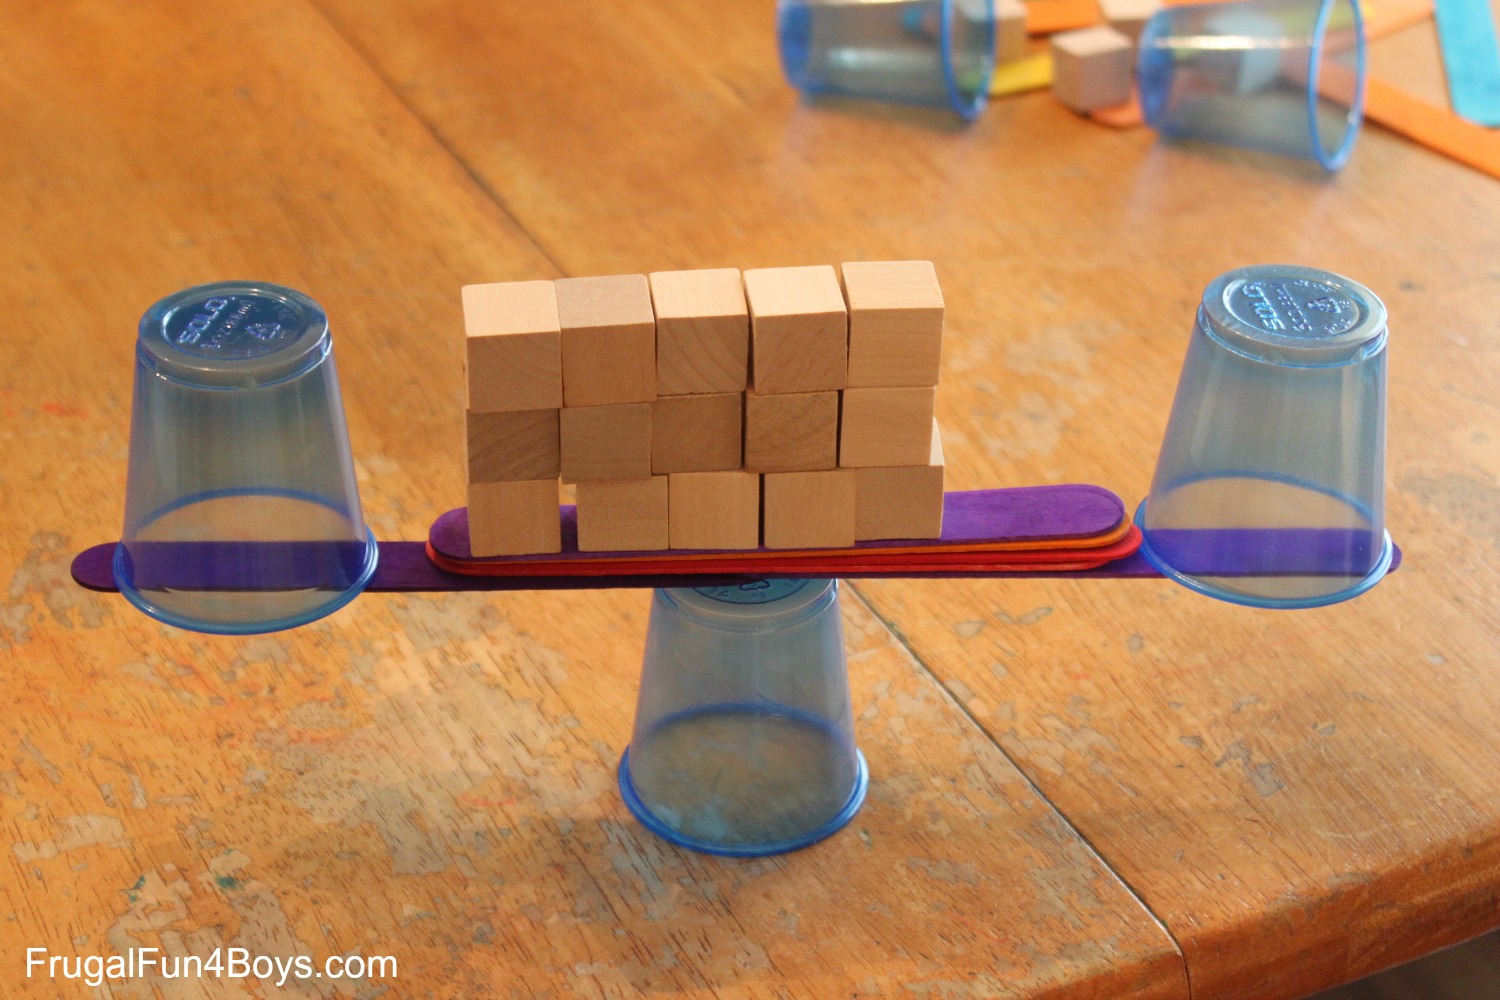
Challenge #3: What can you build with just one cup as the
base?
Here is an example from the Frugal Fun for Boys and Girls

Blog:
4 Engineering Challenges for Kids
INFORMATION:
Center of Gravity - A basic explanation - CLICK HERE
Balancing Objects - CLICK HERE


APPLICATION: Here is another interesting activity
that would be a good extension for older kiddos or for science
buddies where older kiddos help the younger ones: CLICK HERE


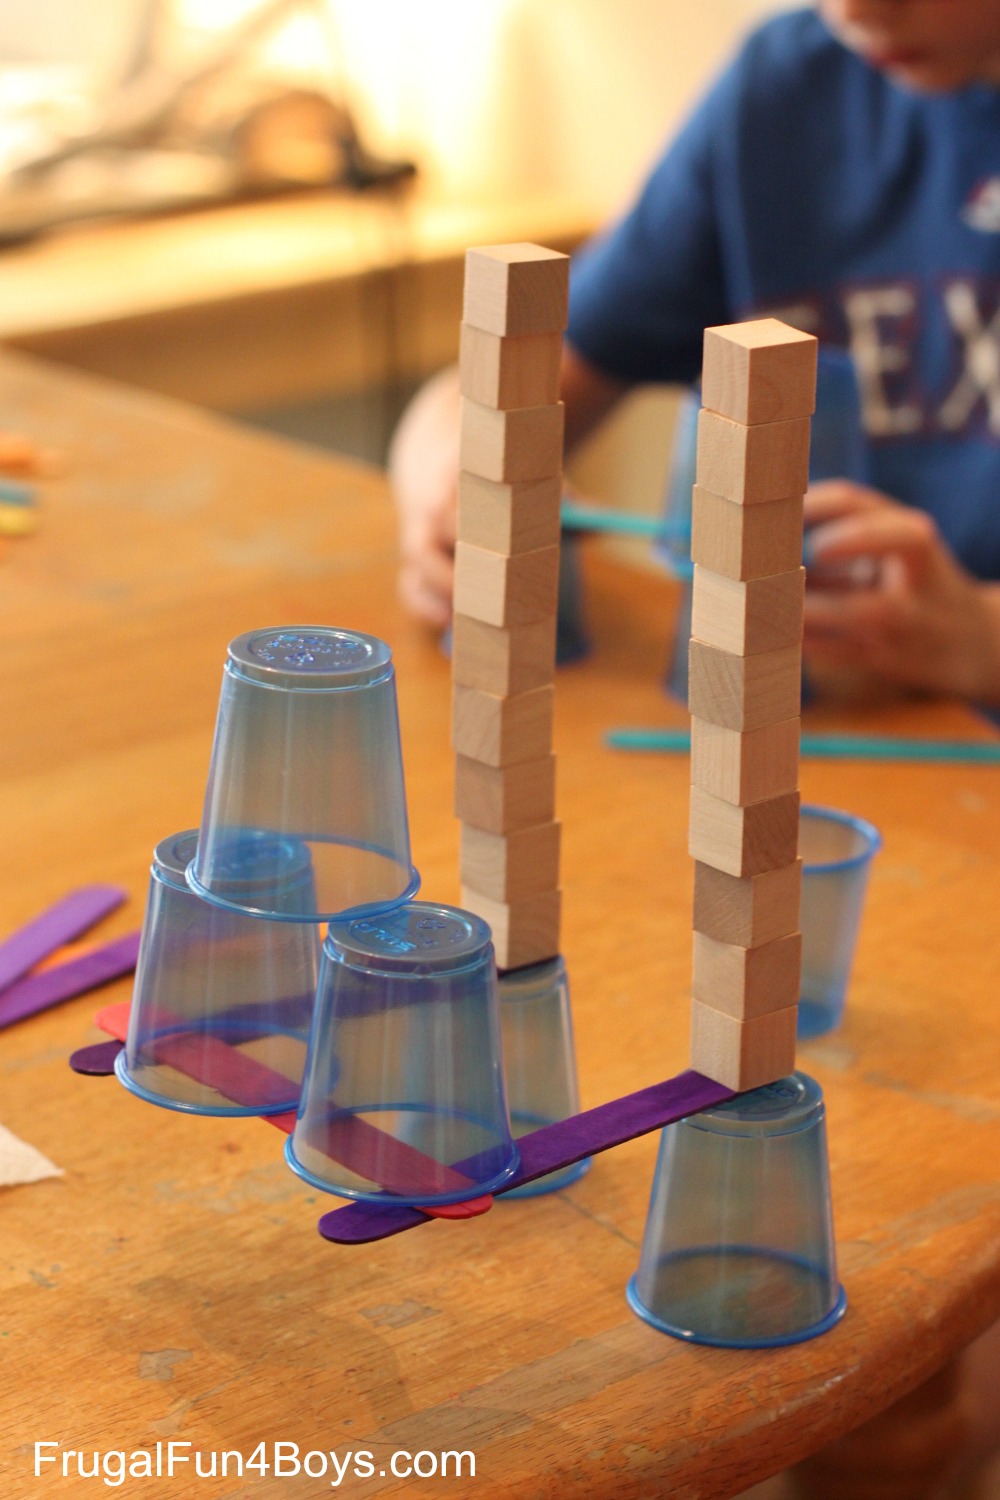
Challenge #4: Feats of Balance. Make something stick
out in an impressive way!
Here is an example from the Frugal Fun for Boys and Girls
Blog:
4 Engineering Challenges for Kids
REFLECTION:
CLICK HERE and make a copy of the reflection Google Form.

Saturday, October 12, 2019

Literacy Makerspace - Dogzilla and Candy Corn Catapults

It's October so for our monthly STEAM challenge we will be using the book Dogzilla and combining it with Candy Corn Catapults:

I love combining literacy with maker and STEAM activities. I have created a Lesson Plan Document:
CLICK HERE and here is the Student HyperDoc: CLICK HERE

There are so many things that I love about this challenge. One is that it can be a stand alone or it can be a jumping off point for students as they study catapults and trebuchets. Using the book Dogzilla brings in the empathy piece and you can challenge the students to consider the mice or the dog as they design.

The first time I did this challenge it was for a parent STEAM day where parents came to school and participated with their student in our STEAM time. This year all sorts of teachers in my district will be doing this with their classes. We also have a high school class that will be going to a second grade class and completing the challenge with them.

I'd like to shout out to one of my favorite bloggers - Frugal Fun for Boys and Girls - CLICK HERE

Tuesday, July 23, 2019

What's in a Name? Chrysanthemum Maker Activity and BOLD Template

This is a great beginning of the year, relationship building, empathy building activity to do with any student K-12. As a middle school teacher I often read picture books to my math/science students as an engagement activity and it was wondrous. You can use the different parts of the activity to teach classroom procedures and expectations from using materials to working collaboratively, to moving about the classroom etc...

SPARK/ENGAGE/ANTICIPATORY SET and a bit of EMPATHY:
Read or watch the video below of the book, 


Reading the book not only sets the stage for the students making their own light up name tags, but it also enables you to do one of a variety of empathy activities such as: (these are just beginning ideas)
  • Quick Think: How would you feel if you were in Chrysanthemum's place? 
  • Quick Write: Do you have an interesting story about your name?
  • Quick Write: What do you love about your name? What is challenging about your name?
  • Have the students voice type their answers to the above question in a Google Doc, or in SeeSaw, or on a Flipgrid
CHALLENGE/EXPLORE/DISCOVER/INDEPENDENT LEARNING:
Figure out how to light the LED lights:
Give each student a baggie or paper bag and challenge them to figure out how to light the lights. 
  • 3V battery CLICK HERE  (to buy on Amazon it's a 50 pack but you will use them for other projects)
  • 4 LED lights (blue, green, red, yellow) CLICK HERE (to buy on Amazon)
This is a discovery activity that can take 10 - 30 minutes depending on how fascinated your students are. If you do this at the beginning of the year it is a great formative assessment for the students who are risk takers and jump right in as opposed to the students who are frozen by a fear of failing and are reluctant to try. 

Side Note: I like documenting how the students are at the beginning of the year and then track their growth as learning risk takers using a Google Sheet.

Teacher Note: I encourage you (the teacher) to play with the four colors because as my students taught me last year, the colors interact with each other and the battery in interesting ways.

INFORMATION/EXPLAIN/PROTOTYPE/TEACH and MODEL:
Here are some examples of possible resources you can use to teach your students about electrical circuits:

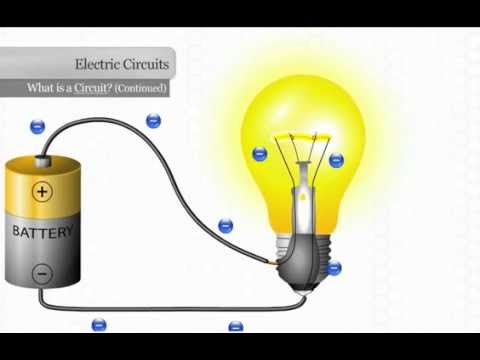
Electrical Circuits for Kids - CLICK HERE
The Power of Circuits Video - CLICK HERE

  • Ask the students what they notice about the 3V battery  (they should notice a plus sign on one side)
  • Ask the students what they notice about the LED light bulbs (they should notice that the wires are different lengths)
  • Ask the students what they notice about the different colored bulbs and how they light when you put two on the battery
Image result for circuits for kids

APPLY/ELABORATE/IDEATE and PROTOTYPE/INDEPENDENT PRACTICE
Now it is time for the students to take what they have learned and make a Name Tag that lights up. They will take their battery and pick two LED lights, write their names and use stickers to create their light up Name Tag.

Name Tag Supply List:

3.5 x 5 Note cards (I get these at Dollar Tree)
Cut up stickers (I buy sheets of stickers from Dollar Tree)
Colored Pens for writing name
3V batteries (Amazon - CLICK HERE)
LED Light Bulbs (Amazon - CLICK HERE)
Lanyards (Amazon - CLICK HERE)
Electrical Tape and/or Masking Tape (I get these at Dollar Tree)

If you would like to make a name tent here is a template I received from my AVID training this summer: CLICK HERE

REFLECT/EVALUATE/TEST/CHECK for UNDERSTANDING
There are many ways to have students reflect on what they have learned and created as well as check for understanding of electrical circuits:

  • Use a Google Form to ask reflection questions and as an exit ticket to check for understanding
  • Use Flipgrid to have the students answer reflection questions and check for understanding questions
  • Use SeeSaw to have students show understanding using the drawing tool and voice explanations and also answer reflection questions
For younger students, I would use sentence frames to scaffold their responses and have the student discuss with a partner first before individually responding.


Thursday, July 18, 2019

Evolution of a Lesson Progression Protocol - 1. Introduction

It all started nine years ago in Rocklin, CA. My goal was to make math more meaningful and relevant for my middle school students while also building an argument to get my first smart phone. Since that year, I have been playing with lesson plan/progression design. Below is a graphic I created to show the things I have been playing with and how they relate to each other.

CLICK HERE to access slide deck

My Why Part 1: Real Life Math Problem Solving
I started playing with lesson design back in 2010 as a middle school math teacher. It was the very beginning of CCSS and we had PLC Modays which means the students went home early so our teacher teams could collaborate over data once a week. With this shortened day, I create Real Life Math primitive HyperDocs CLICK HERE to see the first one I created.

I wanted to take some of the math topics we were studying at the time and combine them with the weekend activities of my family so my students could see some connections (yes they were contrived!) After that first one, I created a new one every weekend the rest of the school year. CLICK HERE for the rest of them.

THIS is one of my favorites from our parent math day when parents came to school with their students during their math period and they did math together. At the time I did not realize I was mashing my own lesson design protocol that would change my teaching forever.

The birth of the K. Beck protocol above (2nd column):

  1. SPARK interest by sharing pictures of our family weekend mundane activities
  2. CHALLENGE/INFORM the students to create math problems based on the information I provided
  3. EXPLAIN the students solve the problems and explain/share their thinking and work collaboratively
  4. APPLY students apply what they know about the topics we are studying to create the questions and solve them and show proof of understanding.
  5. REFLECT unfortunately I was the only one reflecting which drove future planning and creating.
I was influenced by many educators I had begun following on Twitter: Dan Meyer @dydan, Scott Ferrand @scott_ferrand, Matt Townsley @mctownsley

From 2010 until 2013 I used Monday's as my Common Core math problem solving sessions and then I left the classroom to become a curriculum coordinator. 

Next post: 
Evolution of a Lesson Progression Protocol - 2. Instructional Coaching

Wednesday, July 10, 2019

An Administrators Favorite Mobile Apps

Our group of AVID Administrators was recently asked what mobile apps we use most often to help me in my work. I provided a list and did not explain my why. So now that she has asked, I decided to put the what and why here. These are the apps I use DAILY in my work as an administrator:

On my phone, I need apps that will do the following:

  • Organize me
  • Let me dump resources easily into spots that are easy to find
  • Keep me on schedule and where I am supposed to be
  • Allow me to easily share the awesome things that are going on at school everyday


Google Keep - This is my favorite app for so many things:

  • The first is the obvious to do list. But Google Keep is so much more than a to do list! I can make check boxes to check things off and share it with others so they can add or edit as we go. My husband and I have our collaborative grocery list running at all times. 
  • Like other Google apps, it syncs with my laptop so when I'm working at my desk I can see all of my google keep notes and to do lists: 
  • When I'm in a classroom, I can take photos from the Google Keep app and put them directly into a note.
  • I can take a handwritten note on my phone if I want to draw a picture of something
  • There is color coding and priorities
  • Notifications and reminders - you can even get a notification by place (when I drive by a certain Walmart, my grocery list comes up on my phone!)
  • Oh and you can voice type into the app to take notes also which is very handy when I leave a classroom walk through
  • I can even dump articles and highlights from Kindle books into Google Keep (I prefer Google Drive for that but it's handy).
  • It is also an organization app that I am teaching my 13 year old son to use to organize himself.
There is so much more when you consider how students can use it also!


Google Drive - As a mobile app, Google Drive has replaced my use of Evernote.

  • It is my dumping grounds for all resources I find online. When I am reading articles, blog posts or looking at links on my phone I can easily dump and organize them into Google Drive folders with a few taps. I get so many resources on Twitter, Facebook, and elsewhere that I want to save and Google Drive has it available from any device wherever I am am.
  • I have 3 Google Accounts: School, Professional, Personal and I send things seamlessly to the particular one that pertains to the resource I am saving.

Evernote - I started using Evernote in 2007 as my dumping ground for resources. I keep my account because I have so much stuff on it but I barely use it anymore because I use my Google Drives. I don't think any particular app is better, what is important is that you have a place to easily "dump" stuff for future use/reference.

Google Photos - I take a lot of photos at school and around the district and Google Photos allows me to not take up space on my phone because they are uploaded to the cloud. I can organize photos into albums, share with others, easily search for photos, create collages, make basic movies, animations, and then there are the editing tools. Google Photos make sharing photos to school social media accounts so simple.

Google Calendar - This is my number one organizational tool! I would be lost and missing everything without this. I love that when I am standing in a teacher's room and we want to do a collaborative lesson or an observation I am putting it in my phone and inviting her on the spot. Again the sharing ability is key. Our teachers have access to my calendars and they can look and see where I am and what I am doing. We have our School Master Calendar for all staff to see... I can go on and on...

Bitly - Bitly is my go to URL shorten-er that I use when I am sharing a resource that has a very LONG URL. As a Twitter user, with the limited characters, I don't want to waste characters on an URL. Also, when I am sharing with teachers and/or students, I can personalize the URL so that it is easier to type in.

(Twitter, Instagram, Facebook to post school happenings and photos)

I use many more mobile apps but these are the ones I use ALL throughout the day, EVERYDAY!

SIDE NOTE:
One thing I tell everyone, think about what you want to do or what you need the app for and then find the app that suits that need. If someone uses Dropbox then they don't need to switch to something else like Evernote. The apps are technically doing the same job just a bit differently. I picked Evernote because it suited a need for me to dump resources and easily share them with students and teachers.

Friday, July 5, 2019

Find Your Line and Hold Fast

When I was in the classroom, I was reminded daily that students love boundaries and to know where "your" line is with things. This past week I read this post CLICK HERE. It brought back 23 years of line drawing memories for my students and also for my 13 year old son who is a line "dancer".

I am a relationship builder with my students and I'm also a line drawer. I make sure students know where my line is and the consequences for crossing it. I also make sure students know the why and how of the line and how to fix something if they cross it.

Sometimes the hardest thing to do as a teacher or a parent is to hold the line. Also, some lines are "flexible" while others are not. Having policies and procedures helps students navigate your expectations as a teacher. Like most things in life some things are negotiable and some are non-negotiable. I was always upfront on Day 1 of my non-negotiables which were directly tied to being respectful, safe and responsible.

Every year there are students who are line "dancers". These students have to test and test and test and test again making sure that my line is steadfast and that if they cross I will respond. Those are the students who need me to stand the line the most. Some days they put their toes right at the edge and other days they boldly cross as if to say, "What are you going to do?" My reaction begins with a calm action such as gently closing and taking a Chromebook away to whispering in a students ear to follow me to their new seat to stepping outside to have a conversation with the student. It becomes a teachable moment where the student will have to look me in the eye as we discuss what happened and how he/she will fix it.

I am reminded every year as I watch my line "dancers" move from challenging me to working with me that I MUST HOLD the LINE. They do not lay down and become compliant, together we find a place where they can be their incredible selves without constantly testing me and the line. Usually at the end of the school year they are some of my most grateful students. For whatever reason they are thankful that I drew the line and stuck to it.

Last year I had a hard time building a relationship with April. I tried, she pushed and "danced" on the line. I held fast to my lines and held her accountable for her crossings. Most days I felt frustration as she left the room but always gave her a fresh start the next day. Then one day in the spring, she wanted to eat lunch in my classroom with a couple of friends. Then at Open House she brought her parents into my room to meet me. After promotion on the last day of school (I couldn't be a part because I was with my 7th graders) she came to my classroom to give me a hug and thank me for an awesome year. I'm not sure if it was because I held the line, but I think it might have had something to do with it.

Holding the line has ALWAYS worked out for me with my students. I've never been worried about whether or not they like me as long as they know that I respect them no matter what. Holding my line is respectful and it is something that as a parent of a teenager I find more challenging than ever.

Saturday, January 5, 2019

Coding in the Content Areas - Makey Makey Interactive Learning Board


Four yeas ago when I worked for a different district, I stole an idea from Brad Gustafson of creating Mobile Makerspace Carts for his elementary school. Back in 2015 I read THIS POST by Brad which became the foundation for creating STEAM classes at each of our elementary schools and purchasing LEGO WeDo, Spheros, Makey Makeys, and other STEAM tools to integrate into our elementary schools with coaching and support provided by me. (I have quite a few posts about integrating STEAM and the tools here on this blog). 

This year, I found Brad's updated post on his Maker Carts - CLICK HERE and shared it with my new district's leadership and we took our first step in getting the carts started in our 7 elementary schools. The first tool is the Makey Makey. Each school will receive a STEM Pack of Makey Makeys. We chose Makey Makeys to start because we have Chromebooks and we thought this would open doors for teachers to see innovative uses for integration of technology and making into their learning environments.

My first project is pictured above The Singing Christmas Tree. First I found a teacher who was willing to experiment and play with the idea I found on the Makey Makey Facebook group. Mrs. Rennie has a second grade class with a very diverse population. Here is what we did:

  1. Hour 1 - Introduce the Makey Makeys to the students (How To blog post here: CLICK HERE)

  1. Hour 2 - Use Scratch to teach the students how to code sounds then transfer that code to the Christmas songs (Watch this HOW TO video 1 Students Code Sounds - CLICK HERE and watch this HOW TO video 2 Coding Christmas songs - CLICK HERE)


  1. Put the tree up and connect the Makey Makey and Chromebook

The best thing about collaborating with April and Kelly was the ideas they thought of that use this activity as a foundation. One idea is a Growth Mindset bulletin board where students record growth mindset quotes into scratch and then use code to play them when the bulletin board is touched. Each student can read and record their favorite quotes and then open their Scratch code and connect it to the Makey Makey and bulletin board. Another idea is an interactive student of the week board using the Makey Makey.  There are many other projects in all content areas which can incorporate coding, physical computing and reading, listening, and speaking skills. The possibilities are endless and I'll be sharing more here.


Tuesday, December 4, 2018

Hour of Code 2018 - One Slide

Here is the One Slide Hour of Code Newsletter I created for my district teachers: CLICK HERE


There is a cheat sheet with links for the grade bands that you can access on the one slide or you can CLICK HERE

Happy Coding!

Saturday, November 17, 2018

Whiteboards: an Administrator's Tool

Guess My Picture Drawings

Last year in my math class I put whiteboards up around my room and it changed the learning in so many impactful ways. When I moved into an assistant principal position this year, I did't want to give my the whiteboards up. I wanted to figure out a way they could help me help students.

Way #1 - Whiteboards to calm a student down

The other day I got called to the playground to pick up a misbehaving first grader from afternoon recess. By the time I got out there he was in complete meltdown mode. As we walked to my office, he continued to cry uncontrollably and I knew that there would be no discussion of the problem while he was in this place.

When we got to my office, I grabbed the basket of whiteboard markers and invited the student to draw a picture or scribble or do something on the whiteboard to help him calm down. He grabbed a black pen, looked at me and said, "let's play a game." I asked, "what game?" He quickly replied, "guess my drawing." I replied, "start drawing!"

He began drawing and as he drew, I would state the obvious: "it's a rectangle." Each time I stated the obvious, he would get a huge grin on his face and keep drawing. His first picture was on the left - a spider web and the second was a robot.

The process of drawing allowed me to observe and watch this first grade boy's personality come out. He went from hysterical to smiling, creating, problem-solving and calming himself down. Our game of "guess my picture" provided the student with the opportunity to get himself into a place where we could discuss his behavior. The whiteboards allowed for relationship and trust building which carried over to our conversation about appropriate behavior on the playground and in the classroom. They are becoming my go to empathy, social/emotional and conflict resolution tool for helping students.


Sunday, September 16, 2018

Empathy and the Washington Monument


I have changed jobs once again.  I am now split between two jobs: assistant principal and ed tech coordinator.  At our first administrator professional learning community meeting (PLC) we were given a scenario that forced us to DIG DEEP. This scenario had to do with the Washington Monument. Interestingly I had visited the Washington Monument a year ago when I attended #WDC17 (Google for Education Innovator). The picture above shows me with other Google Innovators as we toured the monuments at night. The bright white behind us is the lit up Washington Monument.

Now for an interesting story connecting empathy and the Washington Monument.

In our PLC we were asked to go deeper into data but first we were given an analogy:
The last time the Washington Monument was being restored the folks in charge noticed that the mortar between the bricks was failing. The cause was the cleaner they use to clean and keep the monument white. So the first solution was to find a gentler cleaner, but instead someone else decided to look deeper. That person asked the question: what is causing the dirt on the monument? After exploring it was found that bats were pooping all over the monument. So the next question that was asked was why are the bats around? They found out that there are spiders that the bats love to each all over the monument. The next question was why are the spiders there? Apparently there are gnats all over the building which the spiders love to eat. With that discovery the people in charge realized that the core problem was that the type of lights they use to light the monument at night was attracting the gnats. So instead of searching for a new cleaning substance, they changed the lighting which addressed the chain of problems.

At our Innovator Academy Jennie Magiera shared a story of empathy and slaying dragons. It is a story that helped our cohort think about digging deeper and finding empathy for those educators who might be resistant to change. It's as simple as asking questions and taking time to gain understanding of the person and/or the situation.

I have been diving into the Design Thinking process and attended Design Camp in Monterey CA last February. The focus that day was on the empathy portion of the process which I had not given much deep thought about. To me the empathy piece was just one of the parts of the design thinking process. I believed it was an important part, however, after the Innovator Academy and the design camp something clicked and I now understood that it was the key piece in the process.

As a new administrator my first priority is to build relationships with the admin team, the teachers and staff, students, parents and community of the school. To do that I must ask questions and dig deeper to understand the situation. It is my goal to better understand and build empathy for the person/people and/or the situation.

My goals for this year to build empathy to help shift culture:

  • Seek to understand instead of "fix" the situation
  • Ask questions 
  • Listen to hear and understand, not to respond
  • Observe
I'm looking forward to focusing on empathy with intent this year.

Saturday, July 28, 2018

Thoughts on Failure and Perseverance


Every summer we go to Lake Almanor, three moms and four boys. It is the only time these boys see each other during the year. Today as I was standing in the lake I watched the boys figure out how to all stand on the tube/float. I observed the many failed attempts where all would end up in the water only to get back on and try again. 

My educator eyes are always fascinated by the process folks use to solve a problem or problems. These boys were fighting the laws of physics by actively challenging them. While observing I noticed that the boys never stopped to discuss and plan, they just started climbing back on and figuring out what had to be done so that in the end they would all be standing. I heard so much discussion and problem solving as they were in the process of standing. They were focused, thinking critically and never was there a moment or thought of giving up until they had succeeded. Each failed attempt taught them how not to do it and allowed them to try something new.

There were too many failed attempts to count with only one eventual success and then it was on to the next challenge of the day... Lunch!

They boys were having a wonderful time and each time they failed they laughed and were rewarded by a soaking. Think how different this would have gone down if the moms had told them to do this without getting wet (or failing). One little thing can change the entire scenario and if we had done that the boys would have not even tried. Their willingness to attempt and be creative in their solution would be sacrificed. No action rather than failure.

I often have Yoda's quote posted in my classroom "There is no try, do or do not." I think that if students set their goals to "doing" then they can still have many "trials and failures" which is a part of the "doing" process. But if we add parameters that lead to choosing not to "do" we are robbing our students of the very process we want to encourage.

How do we prove to students that we truly want them to learn from failed attempts in our content area courses? Now this gets me thinking about grading and a whole other can of worms... 


Sunday, July 8, 2018

Picture Book Design Thinking Maker Activities

This summer I am the design thinking enrichment teacher for our Summer Bridge program.  Because literacy is a focus, I decided to base my maker/design thinking projects on picture books.  I work with each grade level for one hour a week and the fifth through eighth grade students see me twice a week.  Here is a list of the books I chose and the activities that go with them.  I'll also include my slide deck from my EdTechTeam K2CanToo conference presentation.  I bought materials for all activities at Dollar Tree #$TreeMakers. If you click on the image of the book it will take you to an Amazon link.

The Dot:
Image result for the dot book images   CLICK HERE for Amazon Link
For this activity I read the dot to the students and have them create their dot.  They can draw, use maker materials, or create an online dot using Google Draw or other tools.  The design thinking part of the activity introduces empathy to the students.  So in creating their dots, they have to introduce themselves to the "audience" and help the audience empathize with them as a person and a learner.

Empathy for Vashti and her fear of drawing

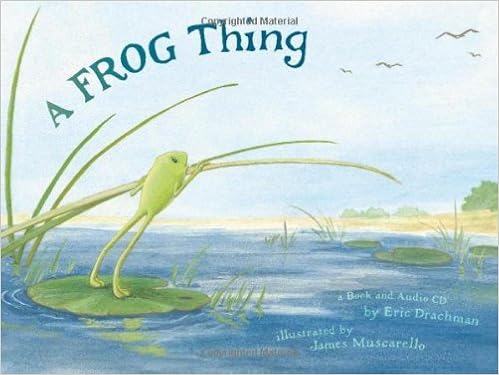
A Frog Thing:
Image result for a frog thing  CLICK HERE for Amazon Link
I love this book for so many reasons but one of the main ones is that it was one of my son's favorite books for me to read aloud to him.  The story is about Frank who is a frog that wants to fly.  His parents tell him he can do anything and when he tells them he wants to fly, they backtrack and tell him they meant he could do any "frog thing".  This book is a great segue into discussing with students that as humans we have invented things that enable us to break out of only being able to do "human things"
For this maker challenge the students have to create a way for Frank to fly.  I bought plastic frogs a dollar tree for the students to use to design a flying apparatus that will fly Frank across the room. The students have to research flight and come up with a way for Frank to fly.

Empathy for Frank and his desire to fly.

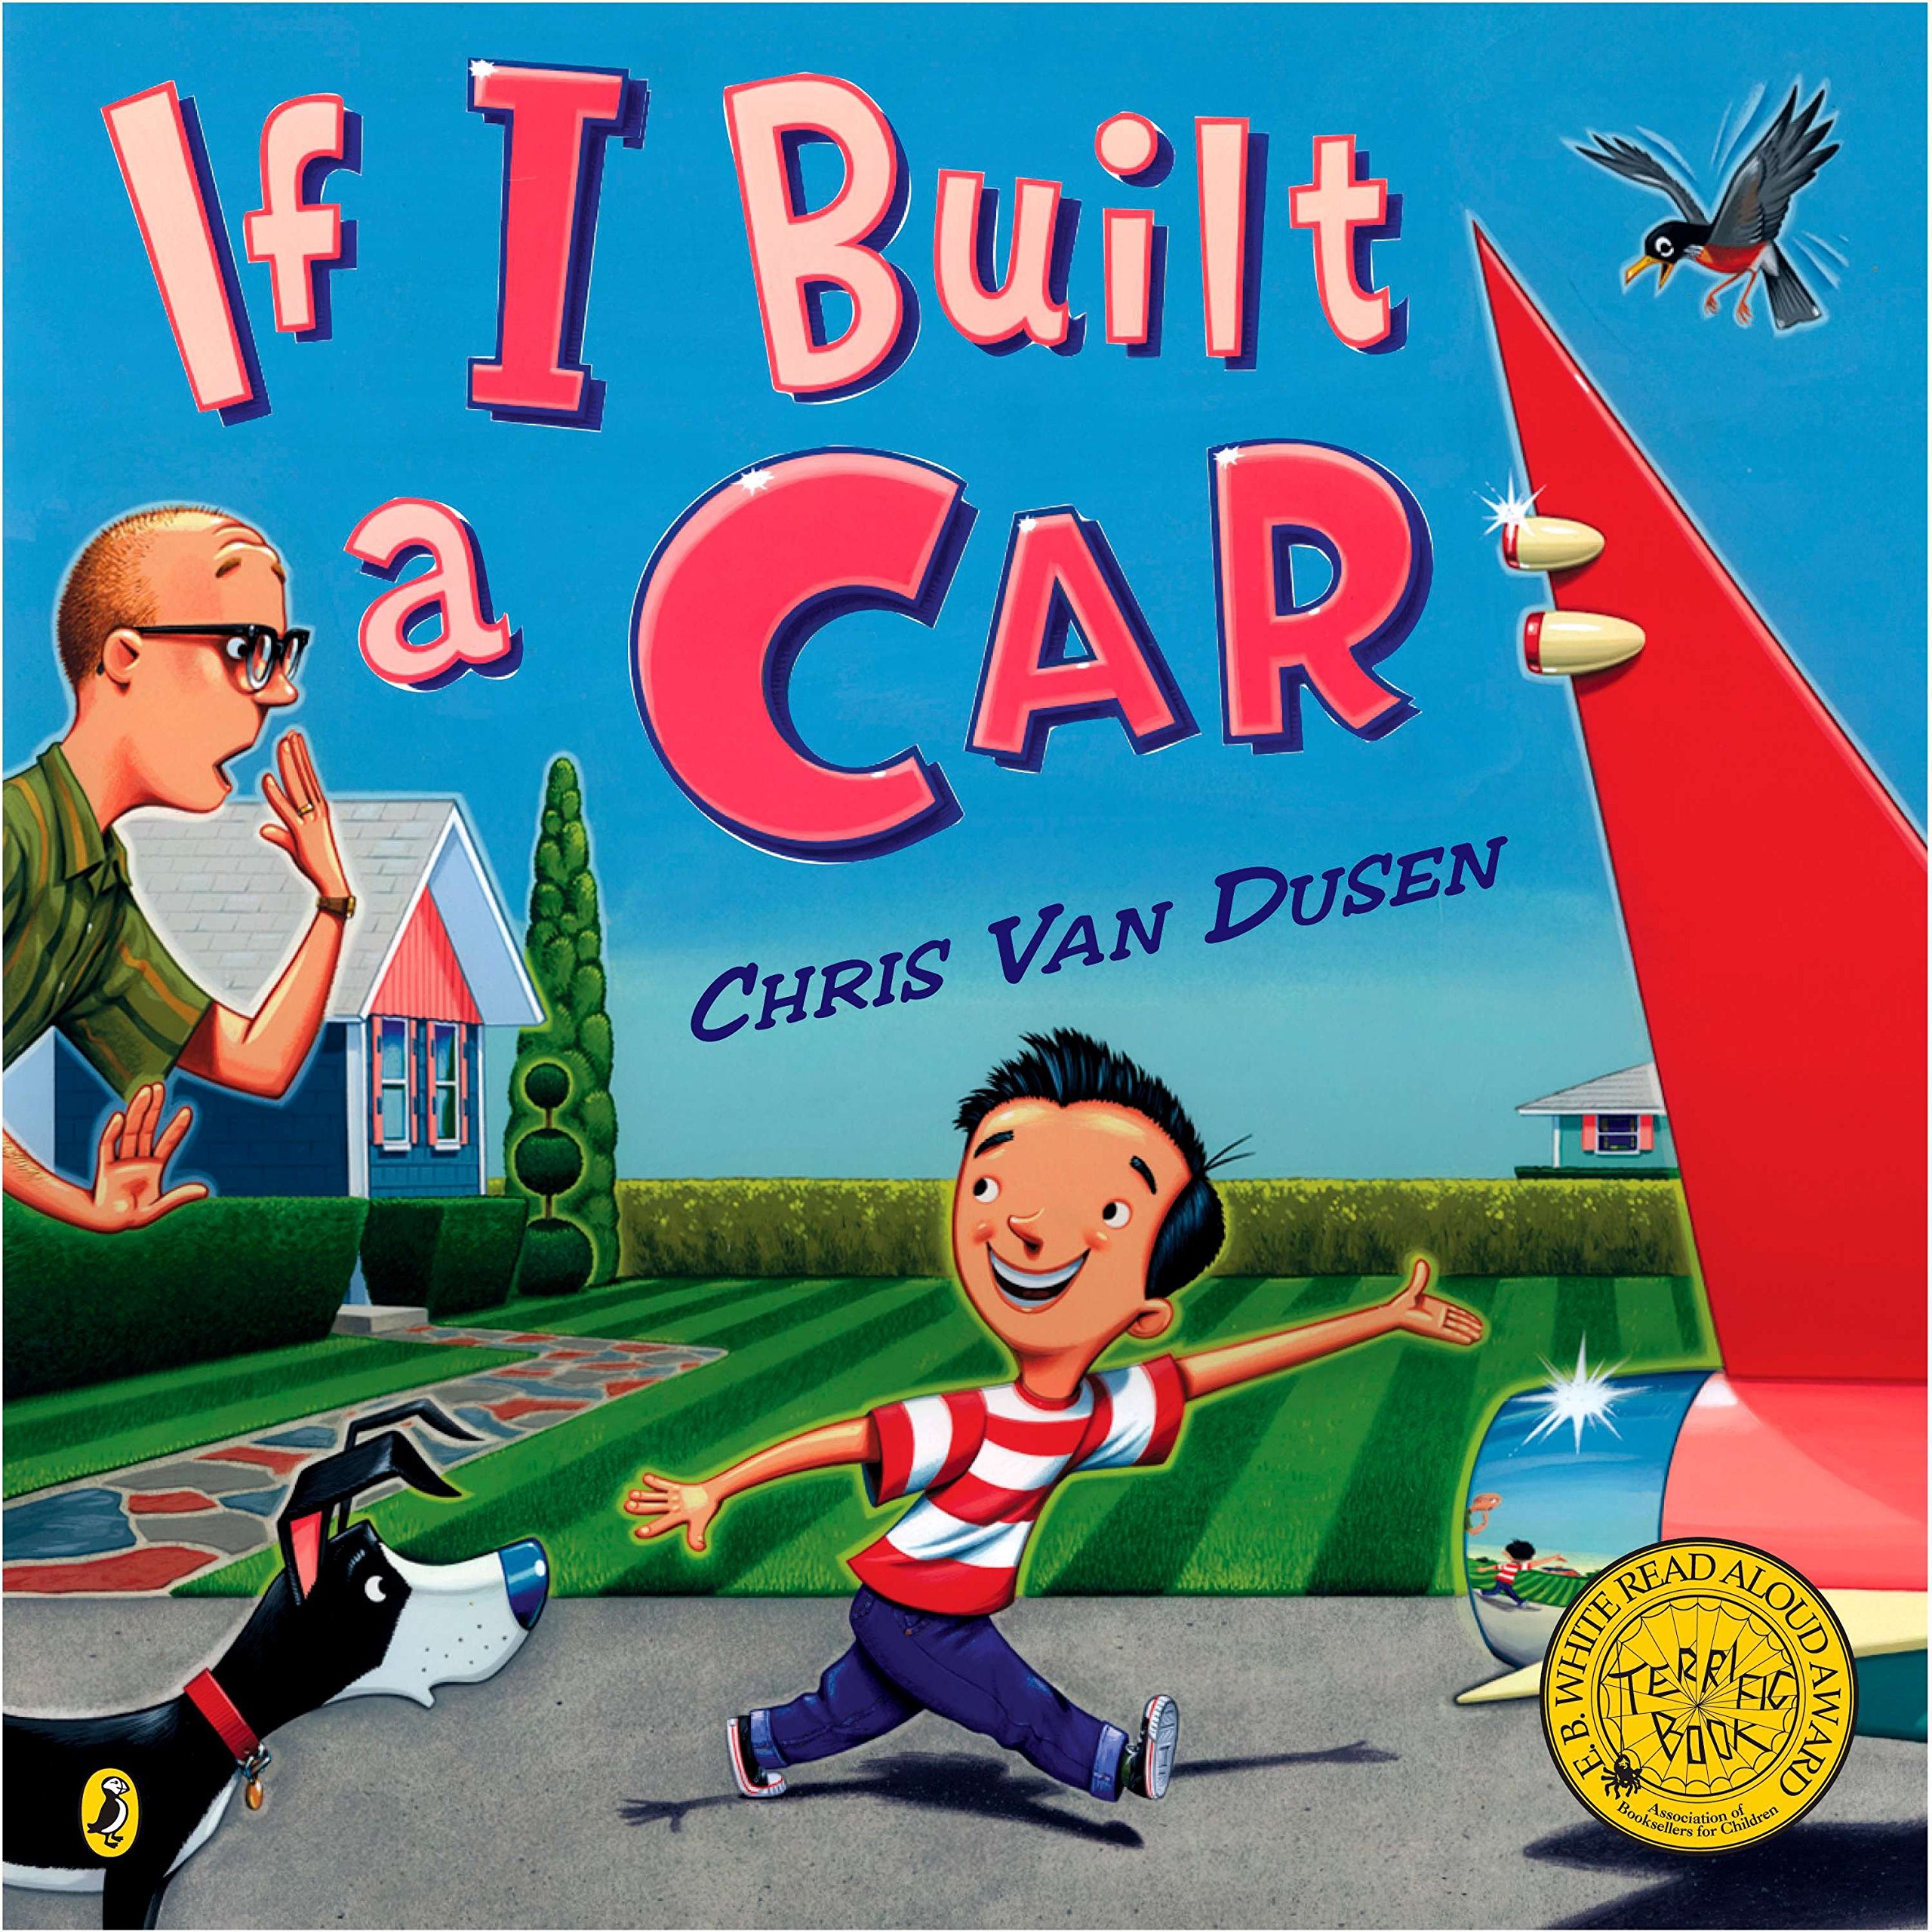
If I Built a Car:
Image result for if i built a car CLICK HERE for Amazon Link
After reading this book to the kiddos, they are tasked with building a balloon car using paper plates, straws, skewers, cups, and tape.  I allow the students to use Chromebooks to look up and figure out how to build a balloon car.  Step two is to have them add motors to their cars.

The Three Little Pigs an Architecture Tale:
Image result for the three little pigs an architectural tale  CLICK HERE for Amazon Link
For this design challenge the students have to build a house with the provided materials that is wind proof (hair dryer test) and earthquake proof (shake the desk test). The students may use a variety of materials such as straws, pipe cleaners, tape, craft sticks, paper plates, whatever stuff I grab at Dollar Tree.

Empathy for the three pigs and their need to be safe from the big bad wolf.

Dogzilla:
Image result for dogzilla  CLICK HERE for Amazon Link
For this design challenge, the students need to build a catapult that will shoot food outside of Mouseopolis and save the giant barbecue from Dogzilla who wants to eat everything.  For this challenge the students can use spoons, rubber bands, craft sticks, and any other maker materials I have around.

Empathy for the mice in Mouseopolis who are fearful of Dogzilla.

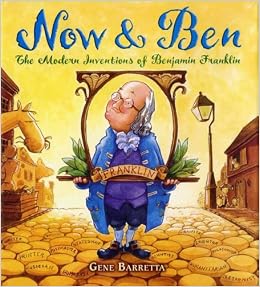
Now and Ben:
Image result for Now and Ben  CLICK HERE for Amazon Link
For this challenge the students create squishy circuits using play dough, batteries, wires, electrical tape, and LED lights.  I get materials from amazon for this challenge.  The students also explore electricity by making name tags that light up with LED lights and 3 volt batteries.  Finally, the students use vibration motors from dollar tree electric toothbrushes and make scribble bots.  They make the bot out of pieces of pool noodles and decorate them with feathers, stickers, pipe cleaners all from Dollar Tree.

I love that I use these books and challenges for students grades K - 8. Each grade level tackles the challenge differently and it is amazing to watch them make and create and figure it out.

Here is my K2CanToo presentation: http://bit.ly/PicBookMaker

Here is a link to some photos from our Summer Bridge design challenges: CLICK HERE

Sunday, April 1, 2018

Choose Your Own Assessment - "Functional but Hideous"


I am in the process of getting back to standards based learning and grading in my math classes.

Back in November of 2012 I wrote this post on Grading Irony which is a great reminder of the power of a zero in the grade book.  It also reminded me that an overall test score provides little information to me and my students on their actual understanding of mathematics.

My transition back into the classroom has had it's ups and downs.  The one thing I know for certain is that I am extremely happy to be back with students.  Back in November, I wrote about a few constraints I'm dealing with Click Here so my shifts right now are small.

In the article "Teaching in BETA" by Jennifer Gonzales, I love the explanation by Joel Lee "the beta phase begins when a product propels from 'functional but hideous' to 'polished and ready to go.' Bugs are hunted down and fixed, features are improved or revamped for maximum usability, the interface and graphics receive an overhaul, and performance issues are optimized."

I have been in BETA all year as I work to innovate my math teaching one baby step at a time.  This is my first, ugly, baby step back into standards based learning.  This however, is more about standards based grading.  As I said baby steps so I at least begin the process.

The assessment I gave on circles was my "functional but hideous" first attempt to journey back to standards based grading in my math classes.  It was a first step and overall it was successful in helping students experience assessment in a different way.  Here is what I did and what I created:

The Functional Part:
  1. Gather Resources 
    • Common Core Math Standards 
    • Our district common assessment is the Topic 11 Test in Pearson Digits
    • Illustrative Mathematics 7th Grade  - Unit 3 Circles - Click Here
  2. Go through the problems and create tiers:
    • "C" problems: Click Here all students must do EVERY Problem 
    • "B" problems: Click Here if you want to get a B you need to do 3 of the 5 problems
    • "A" problems: Click Here if you want to get an A you need to do 1 of the 3 problems
What happened and what I noticed:
    • Some of my students who had not passed a test all year EASILY earned a C by successfully completing the "C" test
    • Students started taking risks because they knew they had the "C" and tried the "B" and "A" problems knowing they would not be punished if they missed them.
    • Students did more/extra problems because they wanted to make sure they got the right number correct.
The Hideous Part:
    • If it were truly standards based, the tests would not be titled according to the grades "C", "B", and "A".  Since it is so late in the year, this is how I labeled them.  This will change to something that does not connect to a grade but a rubric score or a description.  It will involve student input and a lengthy discussion about what is a grade?
    • Although these assessments will provide the students with more specific feedback on the standards they mastered and the ones they did not, this is not the level of specific feedback I am working towards.  I want to get back to standards check off sheets where the students take the feedback and track their understanding of each standard.
    • As I continue this process through the end of the year, I will provide more specific feedback to students and experiment so that I can start the next school year with an assessment that will truly guide student learning and proof of understanding.
This is something that will probably stay ugly and hideous for a while as the students and I work together to make learning and assessment about proof of understanding and not about a meaningless grade.

This process will become one of my math #eduprotocols that will drive learning and instruction in my math classroom. I will continue to share my process and shift here on my blog.

Saturday, March 3, 2018

Reaching Vince in Math Class


Vince began the year as one of my most perplexing students.  He was quiet, he struggled with math, he had strained relationships with the other students.  He dreaded working in groups because he did not fit in with anyone.  Everyday I had to dig deep into my toolkit to find ways to make a connection with Vince.  He is a student that we all have in our classes.  I practiced patience with Vince and worked hard to build trust so that he would take chances in his learning of math.

Everything changed for Vince when the whiteboard walls went up.  It was not immediate.  He was one of the tough ones, a hold out.  He would come in the room and sit at a desk while the other students got to work doing math on the whiteboards.  I would hand him a copy of the whiteboard problems and he would pretend to work on them at his desk.  I understood the risk it takes to put yourself and your math work on the whiteboards.  I would gently encourage and ask questions to try to guide him and get him up to a board.

During our winter break, I added 3 whiteboards to the counter close to my desk and Vince took over the middle whiteboard as his own.  We also started doing Visual Patterns problems which require problem solving and critical thinking and provides opportunities for students to show multiple representations.  For the first time I got to see Vince's mathematical thinking and problem solving abilities:

And when I asked Vince to explain, he was very articulate.  He is a second language learner and working on the whiteboards has increased his confidence, his oral language use, and has given me a glimpse inside his mathematical brain.  I have learned that he has strong math understanding and skills. Unfortunately our online textbook assignments and tests have not shown me an accurate picture of Vince as a math student. 

The whiteboards have allowed me to provide individualized direct instruction and to collect useful data on student understanding, struggles, and misconceptions.  My instructions varies throughout a lesson based on what I see on the whiteboards.  I do mini-lessons for a group or groups who are stuck, whole class instruction, and/or individualized instruction.  We (everyone in the room) write all over the whiteboards so that students have samples to refer to and we are learning with/from each other.

The whiteboards have had a positive effect on all of my students but the impact is profound for my students like Vince who have been able to show how they make sense of mathematics and become a part of our learning community instead of hiding and pretending.

Friday, January 26, 2018

Math Warm Ups on Whiteboard Walls

The whiteboards are up, now what?  The first place I started was with our warm ups.

Procedure:  Play music and give the students the following instructions:

    1. Set your things down in your seats
    2. Get a whiteboard pen and go to a whiteboard
    3. Complete the Warm Up.
    Because my whiteboards are panel boards and are NOT magnetic, I bought little plastic clips from Dollar Tree to hold warm up problems on each whiteboard.  The students know not to write on the warm up sheets and they stay up for all of my classes.  

    I get my warm ups from: Open MiddleVisual PatternsIllustrative MathematicsEngage NY, and our online textbook Pearson Digits (I re-type them etc...)

    Management Note:  At first I tried posting the warm up on our TV monitor but it was difficult for the students to see and they would leave their whiteboard to go read and then they would socialize and I ended up having students "gathering around the monitor".  The second way was to push the questions out digitally on the Chromebooks - saving paper right??  Again this ended up taking too much time because the students would lollygag and check their grades etc...  I want them up and doing math as soon as they get into the classroom!


    Here is how having students begin math class on whiteboards has shifted the learning and teaching in my classes.

    The Learners:
    • They want different colored whiteboard pens so that each person's contribution can be seen
    • They are up and moving and not able to hide behind their Chromebooks or pretend to be writing work on a piece of paper or in a notebook.
    • They are willing to take risks, try to work things out, and learn from their mistakes
    • They have meaningful math conversations and are thinking critically and discussing
    • They are showing multiple representations - this is the way I did it... that is the way she/he did it
    • We see everyone's personality dancing on our walls
    The Teacher:
    • During the warm up I am able to get around to each group and have meaningful math conversations with my students.  I ONLY ask questions to keep them moving, get them unstuck, or to extend their thinking if they are close to finishing up.
    • If the students are struggling, I do not help them, as stated above - I only ask questions!
    • I let any/all answers stay up whether they are right or wrong so we can discuss as a class and the students learn from each other which takes the stigma out of making and learning from their mistakes.
    • I take notes on misconceptions and direct my instruction accordingly.  If all of the groups are struggling on the same thing then I go over it during whole class instruction.  Otherwise, I give each group personalized support in the moment.
    • I am flexible with the needs of my students:
      • Some of my students were very fearful of putting "their math" on the board for everyone to see.  For those students, I provided a copy of the warm up and they could complete it at their seats.  This was only about 1 - 4 students each period.  Once they got over their fear and observed how it worked, they were up and at the whiteboards with the others.  The students still have to do the work, but I'm flexible with their needs because so much goes on with middle schoolers from period to period. 
    Next Steps:
    • Gallery Walks - now that the students are getting more comfortable with each other, I'd like them to start looking at each other's work and place stars and/or question marks to whole class discussions: I like how you... Can you explain how you...
    • We've started writing explanations of mathematical thinking but now I want to have the students write group explanations on the whiteboards which will hopefully lead to better individual explanations.
    • Flipgrid, Padlet, Google Suite etc... - Digital sharing of work and thinking!
    • More student led learning of mathematics
    • Whatever else we can think of...

    Tuesday, December 26, 2017

    The Math Is on the Wall - Installing the Whiteboards

    This will be a series of posts to document and share how whiteboard walls have changed my teaching and student learning in my math classroom this year.

    This post is about purchase and installation.

    Let's Start at the Very Beginning... A Very Good Place to Start...

    Back on August 26th I had an exchange with Chelsea McClellan a math teacher in Pollock Pines CA who invited me into her math classroom that has whiteboards on the walls.  I went and visited on September 7th.  The picture below shows her room.  


    She painted her cabinets with whiteboard paint and added three 4x8 panel boards from Home Depot that she also painted with whiteboard paint.

    I had been researching whiteboard walls for classrooms ever since I attended a CUE event in October 2016 and attended Ed Campos Jr.'s session CLICK HERE to read his blog post.

    After visiting Chelsea's classes I made an appointment with my principal and we discussed how I could make this happen in my classroom.  There were a few stipulations that I needed to follow:
    • The whiteboards had to be temporary (meaning they can be easily taken down if I move rooms)
    • No painting of the desks with whiteboard paint - (again too permanent and I get that!)
    Pretty simple and easy to follow.  I purchased four 4x8 panel boards from Home Depot (click here).  I had three of the boards cut in half - 4ft. x 4ft. and one of the boards was cut into fourths - 2ft. x 4ft.
    My after school STEM club installed the whiteboards:

    • They put duct tape around the edges of the boards
    • Used 16lb Velcro to put on the walls (click here


    I'll be adding one more board cut into thirds against my cupboards opposite this picture before we go back after winter break.